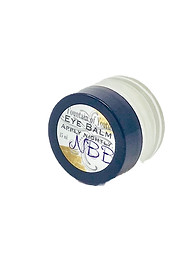
Multi-Step Tutorial
Step 1: Oil Cleansing
Oil cleansing is an effective first step to remove makeup, sunscreen, and excess sebum without stripping the skin. Oils dissolve oil-based impurities, making this step gentle yet thorough.
-
Use a clean palm to apply a small amount of cleansing oil.Massage gently over dry skin for about 1-2 minutes.
-
Use a cotton or terrycloth wash cloth wet and wrung out with warm water to help open pores, then gently wipe away the oil emulsion.
If you wear waterproof makeup, oil cleansing helps break it down better than water-based cleansers alone. A microfiber or cotton pad is recommended for removing eye makeup due to the delicate nature of the skin.
Step 2: Detergent Based or Soap Cleansing
After oil cleansing, use a detergent-based cleanser or gentle soap to remove sweat, dirt, and leftover residue. This step ensures your skin is fully clean and ready for treatment products.Choose a cleanser suited to your skin type, season and environment.
-
Apply to damp skin and massage in circular motions.
-
Rinse with lukewarm water and pat dry with a soft towel.
Step 3 (Weekly): Masks and Scrubs
Earth based masks
These help detoxify the skin by drawing out impurities and excess oils. Use them 1-2 times a week depending on your skin’s needs. (Sheet masks, unless specifically designed to detoxify, should not be used in this step.)
-
Apply an even layer of mask toApply an even layer of mask to clean, dry skin.
-
Most mud masks will instruct you to leave on for 10-15 minutes or until it starts to dry, a tingling sensation is normal.
-
Quick cleansing masks will instruct you to leave on for a shorter period of time. These are often more gentle and suited for sensitive skin.
-
Rinse off with lukewarm water and gently pat dry.
Exfoliating Scrubs
These eliminate dead skin cells, encouraging cell renewal to yield a brighter, smoother skin tone and texture. This also includes lip scrubs.
Apply exfoliating scrubs 1-2 times weekly, based on your skin's sensitivity. For sensitive skin, it may be suitable to use a mask once a week and alternate with a scrub once a week, resulting in each being used twice a month.Choose a scrub with fine, gentle particles.
-
Apply to damp skin and massage lightly for 30-60 seconds.
-
Rinse thoroughly and avoid over-exfoliating to prevent irritation
Step 4: Toning
Toners balance the skin’s pH and prepare it for better absorption of serums and moisturizers. They may contain probiotics which strengthen the skin barrier in their own way, astringents that make pores less visible, antioxidants that fight free radicals, or soothing ingredients that aid in healing and reduce redness.
-
Choose a toner suitable for your skin type or goals.
-
Spay directly on the face in an X patern or apply to cotton ball and swipe gently all over.
-
Should be used on the neck and chest as well.
-
Let it dry fully before moving to the next step.
Step 5: Serums
Order of Application for Water and Oil Based Serums
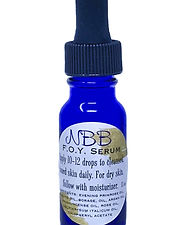
Serums are specialized liquid formulations designed to target and address specific skin concerns effectively. Unlike traditional moisturizers, which primarily focus on hydrating the skin, serums contain a higher concentration of active ingredients, allowing them to penetrate deeper into the skin layers and deliver potent results. Serums are formulated to tackle a variety of skin issues, including but not limited to, acne, hyperpigmentation, fine lines, and uneven skin tone. Their ability to deliver active ingredients directly to the skin makes them an invaluable addition to anyone looking to address specific skin concerns, while this seems to be the most daunting part of a new routine, it's actually quite simple:
water before oil.
Light before heavy.
Oh, and don't touch the dropper to your face and contaminate the rest of the product...
Water-Based Serum:
-
Apply water-based serums first, starting with the thinnest, lightest consistency which absorb quickly.
-
Use thicker serums and essences second, they take longer to absorb. Allow each to dry before applying the next.
-
If using a micro-current device, it is advisable to use it during this step, as oils do not act as adequate conductors for electricity. Simple hyaluronic acid based serums are most commonly used with these devices.
-
It is advisable to use one with multiple weights of HA as heavy weights create slip and do not absorb as easily and low weights are small enough to penetrate the skin barrier.
Examples of layering based on viscosity are blue serum followed by nutri-drench essence.
Oil-Based Serums:
-
Follow the same protocol with oil based serums and essences, beginning with the lightest and finishing with the heaviest.
-
Oil based serums will not dry, but they will absorb into the skin, gently massage and move on to the next one if you are using more than one. Oil creates a barrier to lock in moisture.
-
Depending on your skin type, your environment or the season, you may not want to finish with an additional moisturizing lotion or cream.
If using an eye serum, use during this step along with other water or oil based serums depending on the type.


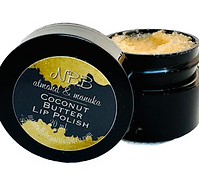



Step 6: Moisturizer/Sheet Mask
One of the most important components of a skin care routine, moisturizer replenishes the oils that have been lost in the cleansing process. They plump and hydrate the skin with different components that penetrate and fortify the skin barrier.
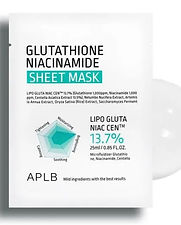
Sheet masks in the US are generally used as a treat or necessity (hot date, photographed event, etc.), but not an everyday affair. In other countries they are used daily for just a few minutes. This has to do with market formulation, the single packed style that we sell and you see elsewhere have been made rich and contain a lot of 'essence'. They are designed to be used no more than 1-2 times per week.
-
Choose a moisturizer appropriate for your skin type, environment and season.
-
Apply a thin layer to the face, neck and chest, gently rubbing in with small circles with fingertips.
-
Sheet masks are used after dedicated serums, locking them in. Therefore they become a substitution for moisturizer. Adding another layer of lipids/moisturizing factors for most people would be too rich and heavy
Exceptions might include healing from sun or wind burn, excessive exposure to cold, living in the desert, or perhaps post procedure (follow dermatologist advice). They are often useful products that enhance device efficacy.

Step 7: SPF ... AM
Every Single Day. Rain or Shine. Inside or Out. If there is nothing else you take away from this tutorial, let it be this. SPF and hats and sun umbrellas or whatever else... There is nearly nothing else more harmful for skin health than overexposure to Sun.
Do The Things.
-
Apply sunscreen as the last step in your am routine. Especially if using chemical exfoliants (acids) or retinol (or its other forms/derivatives). Your skin is more sensitive to UV damage when using these products and not protecting it properly often leads to hyperpigmentation or melisma which are very difficult to treat.
Step 7: Eyes, Morning and/or Night
Eye products generally go last. The eyes have to most delicate skin on your face and should receive a little extra attention.
-
Apply eye balm or cream around the eyes from the nose to 1 inch away from the outside edge of the eye, from the eyebrow down to the cheekbone.
-
If using retinol creams, apply in this step, following moisturizer to minimize irritation.